Hannah has an armhole dart, which is an unconventional dart placement that you might more often find in vintage clothing. I know you’re likely scratching your head about this one. Because of this dart placement, this bust adjustment tutorial may look a bit different to those you’ve seen before. These bust adjustments for the Hannah pattern will allow you to add or reduce fabric at the bust area, adjusting the dart size, all while maintaining the size of the waist and hips.
Here’s what we’ll cover in this tutorial:
- Selecting your size
- Determining your cup size
- Determining the amount to adjust your pattern
- Full bust adjustment tutorial
- Small bust adjustment tutorial
- Adjusting your apex
- Truing your adjusted dart
Let’s get started!

Selecting your size
Hannah is made for a B-cup and has a wearing ease of 1 ¾”. To determine your bust size and cup size, you will need to take your high bust and full bust measurements.
After we take these two measurements, we will take note of the difference between them. This difference will determine our cup size and will tell us if we need to make a bust adjustment.
Take your measurements:
- Wear a well fitting bra while taking your measurements.
- Measure so that the tape is snug and make sure your fingers are not underneath the tape
- Measure your high bust: around your body, just under your arms, around your chest and upper back

- Measure your full bust: Around the fullest part of your bust with the tape parallel to the floor.

Determine your cup size:
Calculate the difference between your high bust measurement and your full bust measurement.
-
1” difference or less: This difference means that you are an A cup and will need to do a small bust adjustment. Select your bust size from the pattern’s size chart based on your high bust measurement. This will ensure that the garment fits properly in the neck and shoulders. Then you’ll make a SBA to reduce your cup size.
-
2” difference: This difference means that you are a B cup. You won’t need to make a bust adjustment and you can select your bust size from the pattern’s size chart based on your full bust measurement.
-
3” difference or greater: This difference means that you are a C cup or higher and you will need to make a full bust adjustment (FBA). Select your bust size from the pattern’s size chart based on your high bust measurement. This will ensure that the garment fits properly in the neck and shoulders and the FBA will increase your cup size.
Determining the amount to adjust your pattern:
FBA
Example measurements: High bust: 37”, Full bust: 40”
I’ve determined that I’m a 3” difference between my high bust and full bust. I’ve selected my bust size for my pattern based on my high bust measurement (size 8).
Now, take the difference between your high bust and full bust (3”) and divide in half (1.5”). We are dividing the measurement in half because we are working with half of the dress pattern.
When we make our adjustments, we’ll be spreading our piece out to build in 1.5” at the bust.
SBA
Example measurements: High bust: 34”, Full bust: 35”
I’ve determined that the difference between my high bust and full bust is 1”. So I’ve selected my a pattern size based on my high bust measurement (size 4).
Now, take the difference between your high bust and full bust (1”) and divide the amount by half (e.g.: 1/2”). We are dividing the measurement in half because we are working with half of the dress pattern.
When we make our adjustments, we’ll be shifting our pieces in by ½” at the bust.
Bust adjustment tutorial:
For this bust adjustment, whether you’re making a small or full adjustment, you will start out the same way. When we get to step 4 and we’re ready to increase or decrease the pattern, I’ll give one set of instructions for FBA and one for SBA.
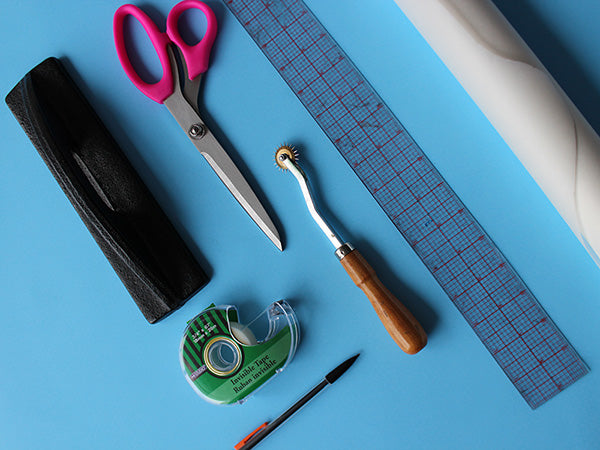
Tools:
- Clear drafting ruler
- Paper scissors
- Pen or pencil
- Tape
- Paper weights
- Tracing paper. We’ll be making some hefty adjustments, so get something durable. Tracing the pattern. Swedish tracing a paper is a treat to work with as you can also sew it up to check your fit.
- Make sure to trace all pattern markings to your traced Dress Front pattern piece.
- Tracing wheel for truing your dart
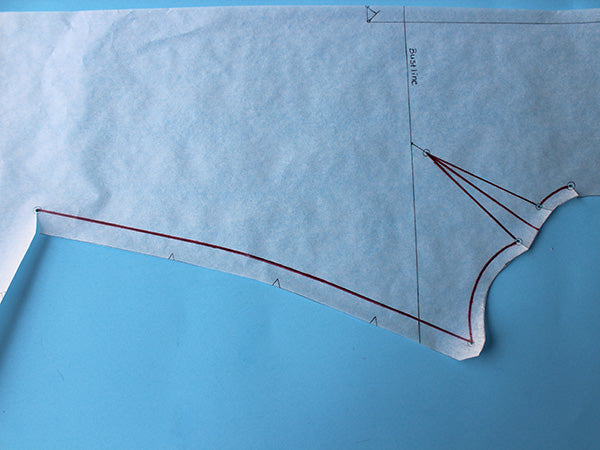
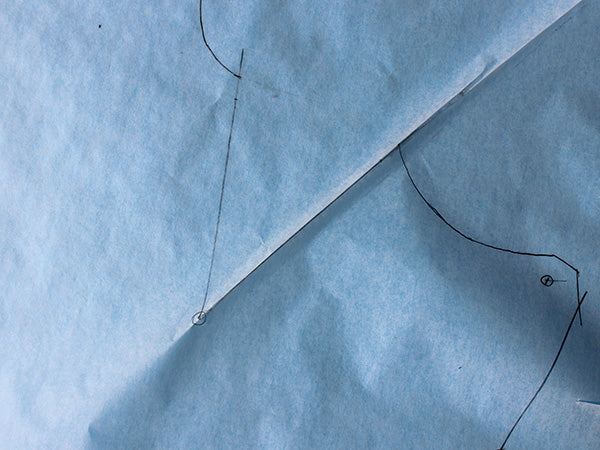
Step 1: Mark your pattern
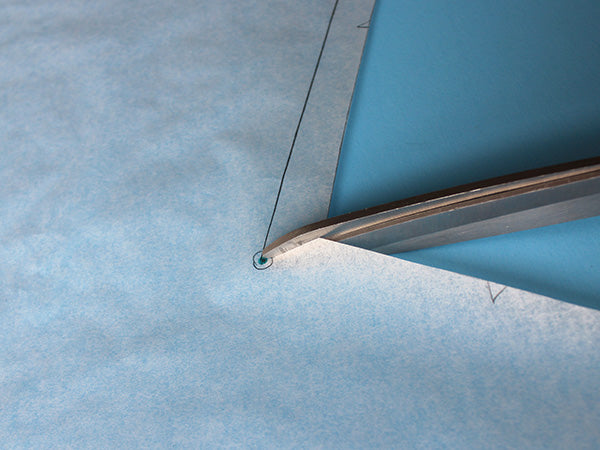
1. With a clear drafting ruler, trace the stitch line along the side edge, beginning at the match point near the pocket corner and drawing to the match point near the armhole. The seam allowance here is 5/8”.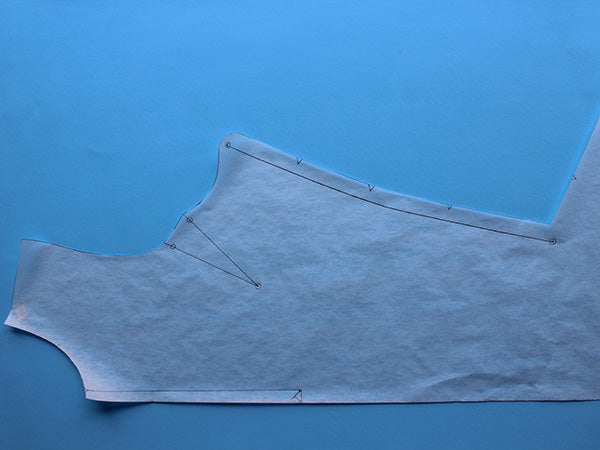
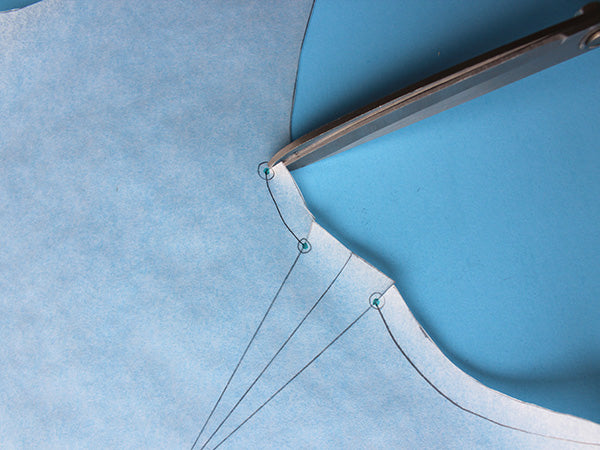
2. Trace the stitch line along the armhole. The seam allowance along this edge is 3/8”. Continue drawing the stitch line along the armhole up until 1” above the dart.
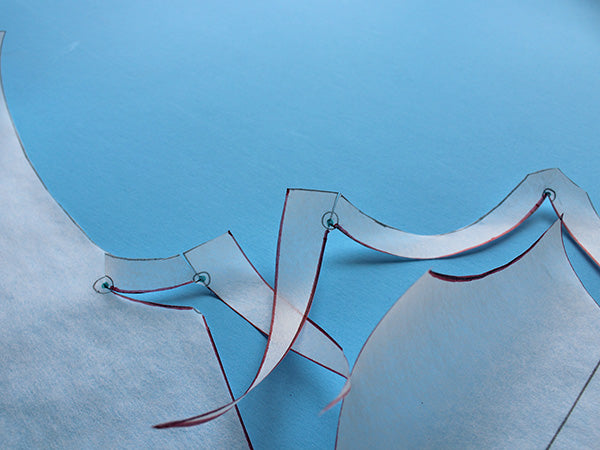
- Tape the main body of the pattern in place, leaving the cut portions aside for adjusting.
Step 4: Adjust the pattern
Full Bust Adjustment
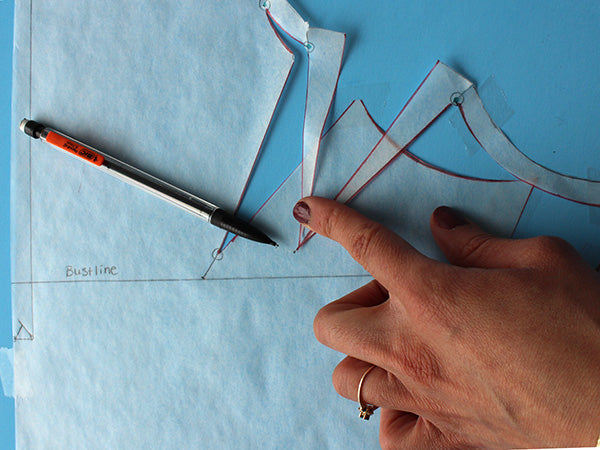
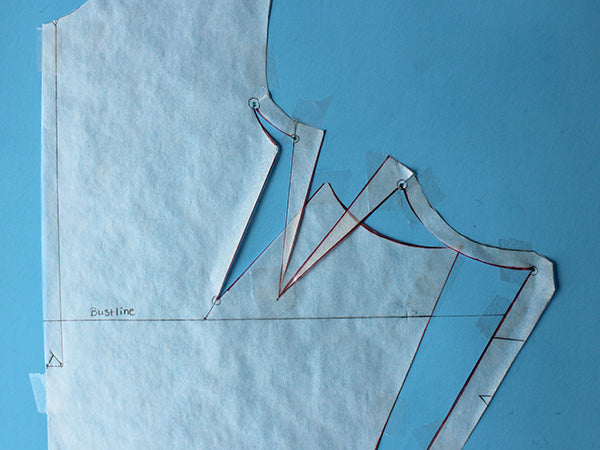
- Extend the bust line out from the side edge of the pattern. Measure out from the cut side edge by the amount to adjust (e.g: 1 ½”). Mark the point.
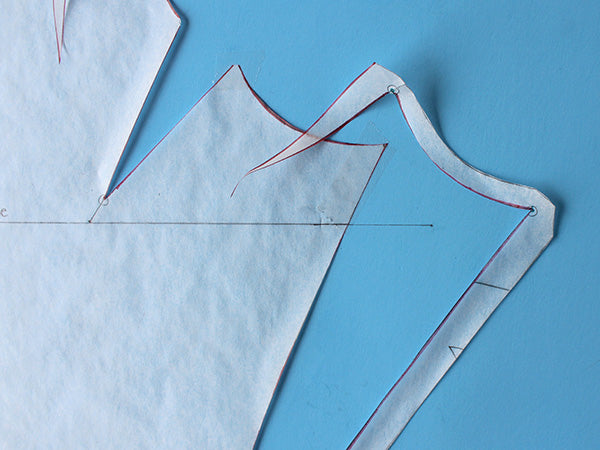
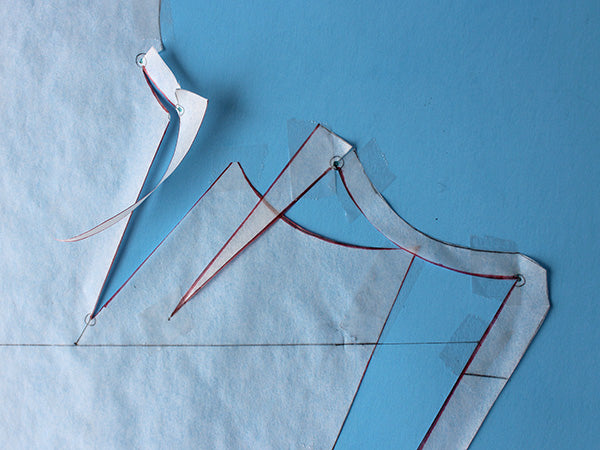
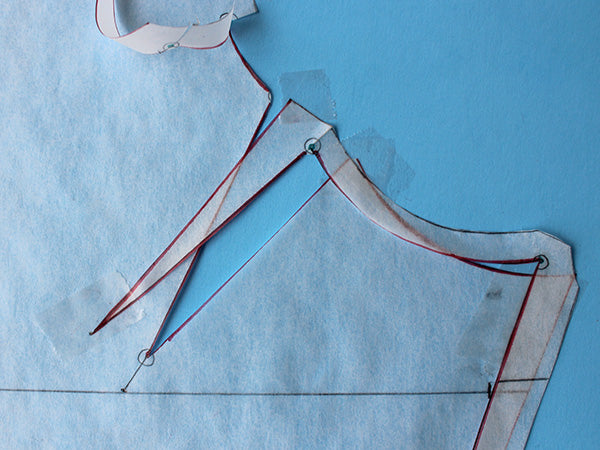
- At the hinge found at the pocket corner, pivot the side edge seam allowance outwards, away from the piece. Align the inner edge of the cut seam allowance to the 1 ½” mark along the bust line. Tape the seam allowance in place along the side edge and armhole, up to the first dart leg.
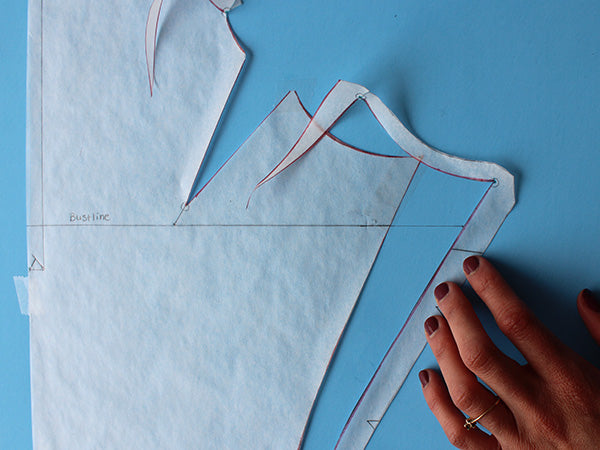
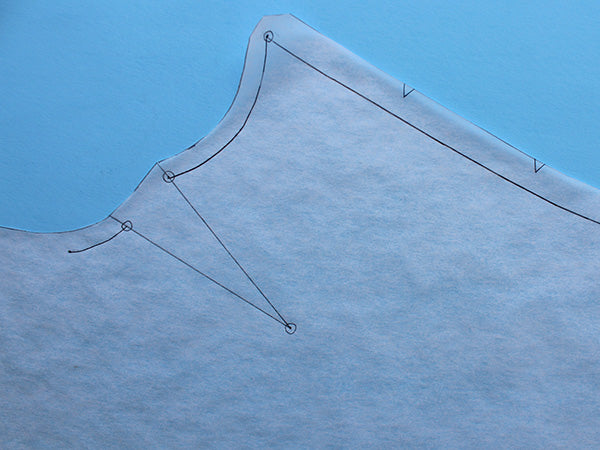
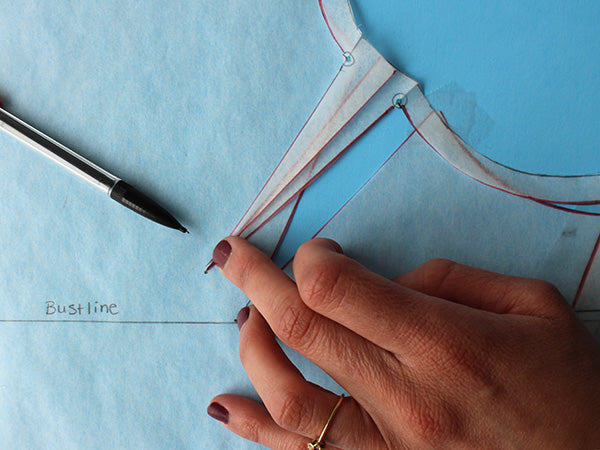
- You will need to find the position of the dart. To do so, match either side of the dart together at the tip of the dart, allowing the seam allowance to rotate at the hinges. With the points together, and the dart excess laying flat on either side, mark the apex of the dart.
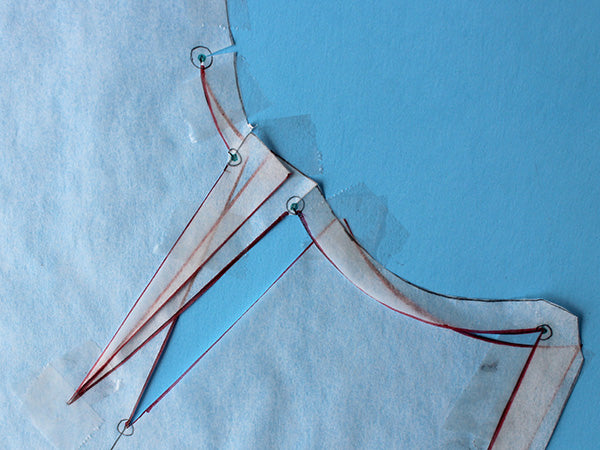
- Pivoting at the pocket corner hinge, shift the side edge seam allowance inwards towards the piece. Align the inner edge of the seam allowance to the ½” mark along the bust line. Tape the seam allowance in place along the side edge and armhole, up to the first dart leg.

- You will need to find the position of the dart. To do so, match either side of the dart together at the tip of the dart, allowing the seam allowance to rotate at the hinges. With the points together, and the dart excess laying flat on either side, mark the apex of the dart.
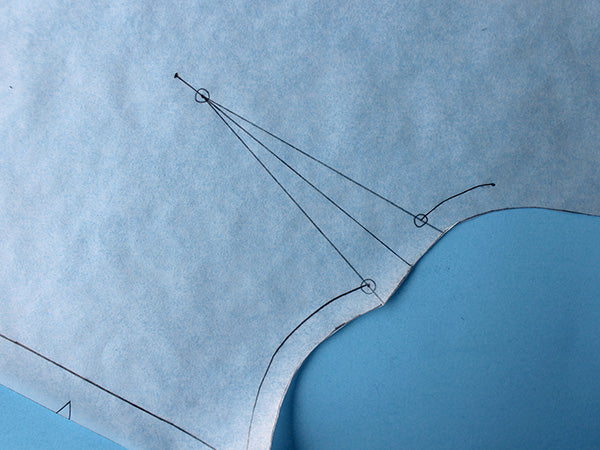
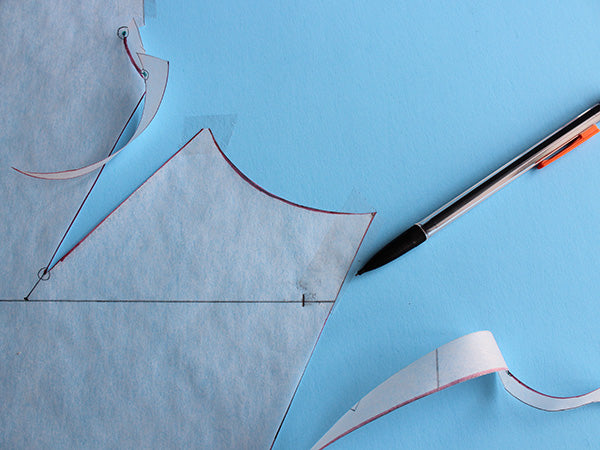
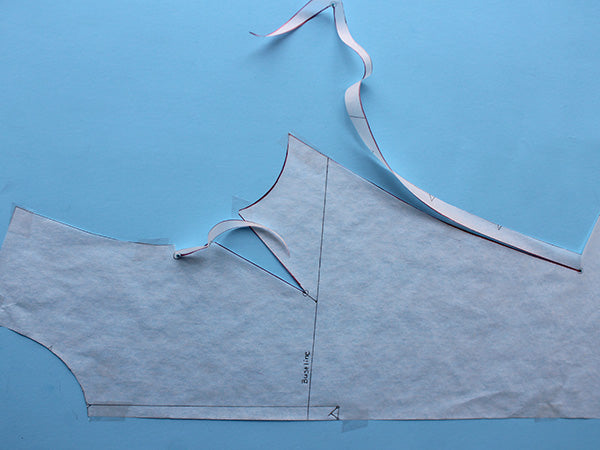
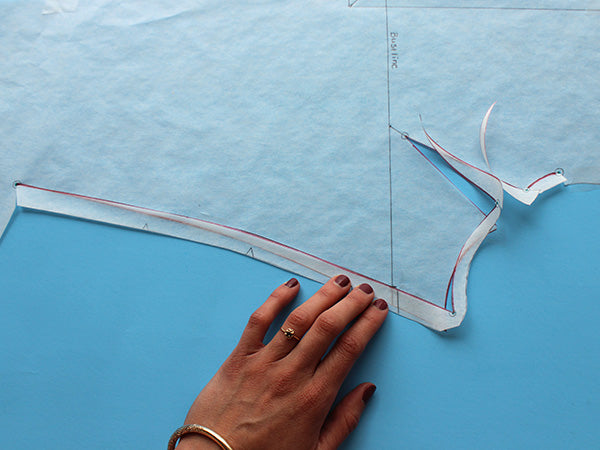
- Secure the first side of the dart in place, matching the tip to the new apex.
- Secure the remaining portion of the dart in place, matching the tip to the apex.
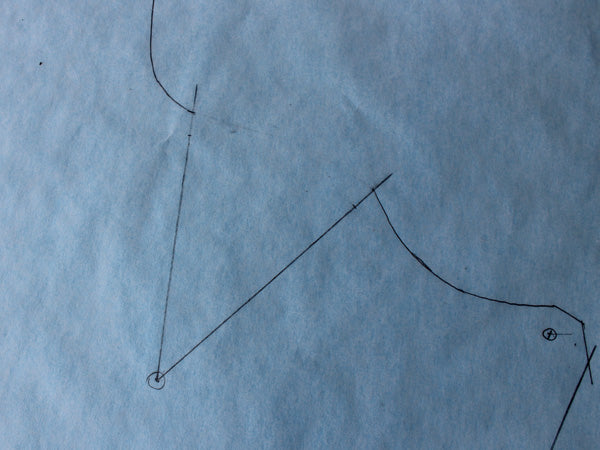
- Re-trace the pattern piece making sure to transfer all pattern markings and annotations from the original pattern. You will need to true your dart excess and perhaps change your apex location.
Apex:
Apex is the highest point of the bust which the bust is directed towards. The tip of the dart should end about ½” to 2” away from the apex, depending on your cup size. This distance is something you may want to play around with when fitting your muslin.
After making the bust adjustment to your pattern you will want to determine if your personal apex position needs adjusting.
Locate your own apex:
Method 1:
- Place the adjusted Dress Front pattern piece onto your chest. Align the center front, neckline and shoulder edge to your body.
- Keep in mind, that the neckline has 3/8” seam allowance ,and the shoulder has 5/8” seam allowance.
- Mark a point at the highest point of your bust. This will be your apex.
Method 2:
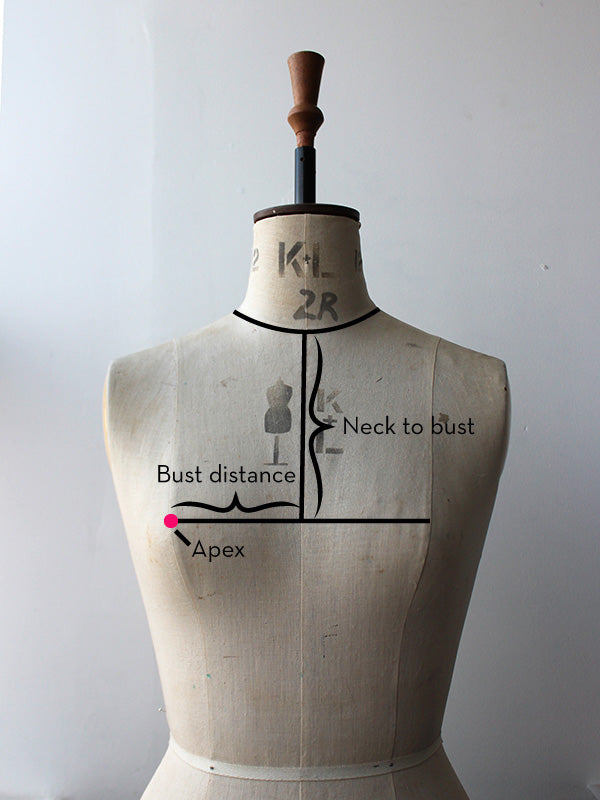
- Find your neck to bust measurement: measure from the base of your front neck (collarbone edge) down to your bust line (line parallel with your bust point).
- Find your bust point distance measurement: At your bust line, measure across from bust point to bust point to determine the distance between the two points. Divide this measurement by half.
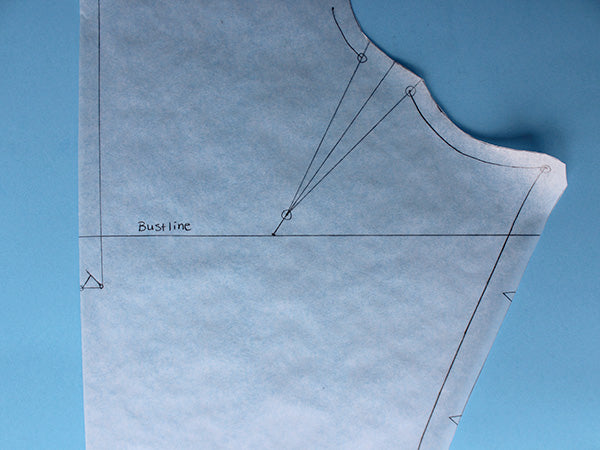
- On your pattern, mark your apex by measuring down from the neckline (adding 3/8” for seam allowance), and in along your bust line by your halved bust distance measurement.
Truing the dart
Once your new pattern piece is traced out and all markings and annotations transferred from the original pattern, you will need to determine the new dart excess. If you have adjusted your apex location, draw your dart legs to point towards the apex, by at least 1/2” away from that point. You can adjust the distance from the apex when you make your muslin.
This example is shown with the FBA pattern piece, but the method applies to SBA pieces.
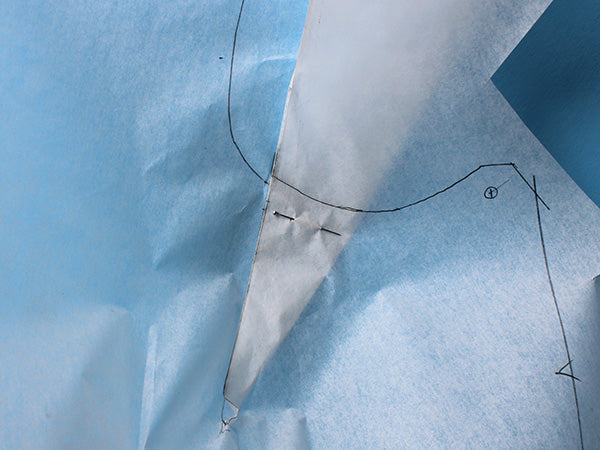
- Trace out the piece without any dart excess.
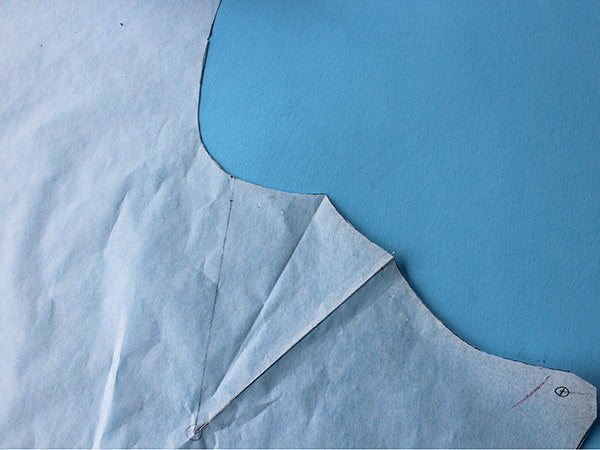
- Crease the paper along the dart leg closest to the side edge.
- Bring the creased dart leg over towards the remaining dart leg, turning the excess towards the side of the garment. Pin through the layers of paper to hold the dart in place.
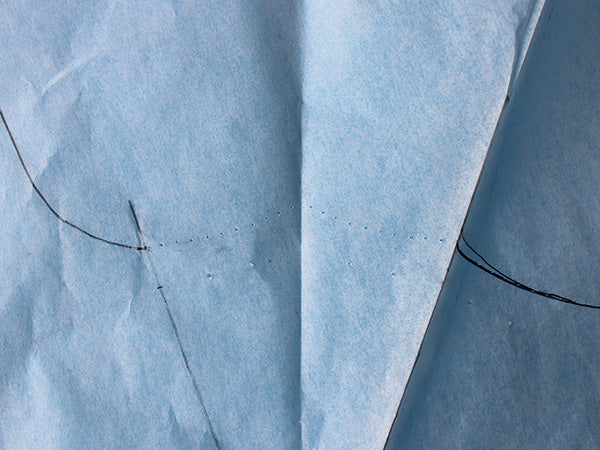
- You will likely notice that the edges along the armhole no longer align. Adjust this by blending a smooth line to form a smooth, continues edge. With a tracing wheel, trace along the newly drawn line.
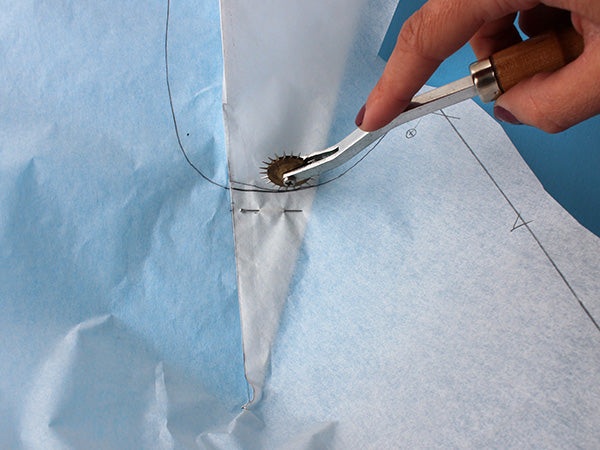
- Unfold the piece. The perforated marks from the tracing wheel will indicate to you the new dart excess.